
Create a listing: the 7-step wizard
Property Details, Location Setup, Pricing, Features & Utilities, Policies & Rules, Photos & Media, Verify Documents. What each step asks, what is required, and what happens after Publish listing.
Before you start
Have ready: the address, the layout (1+kk, 2+1, and so on), usable and total area, rent, deposit, utilities, house rules, and photos of every room plus the building. For the Verified badge you also need proof of ownership or right to sublet: a cadastral extract (výpis z katastru nemovitostí, free from nahlizenidokn.cuzk.cz), a purchase agreement, or your lease plus the owner's written permission to sublet. Agents upload an authorisation letter from the owner.
Step 1: Property Details
Property type, room configuration (Czech layout codes), property condition, a description (up to 2,000 characters, with an AI-enhance option on iPhone), usable area and total area, building type, year of construction, recent renovations, and energy class.
Step 2: Location Setup
Street address with autocomplete, and the privacy option: Show exact address, Show only district, or Show approximate location on the map. Nearest civic amenities (transport, shops, schools) are detected from the address.
Step 3: Pricing
Monthly rent, deposit (Czech law caps it at three months' rent), utilities and what they include, and agency commission if any. The preview updates as you type.
Step 4: Features & Utilities
Heating type, internet and cable options, furnishing status (required), what is available (bed, sofa, refrigerator, washing machine, dishwasher, and so on), and building amenities (balcony, garden, lift, parking, storage).
Step 5: Policies & Rules
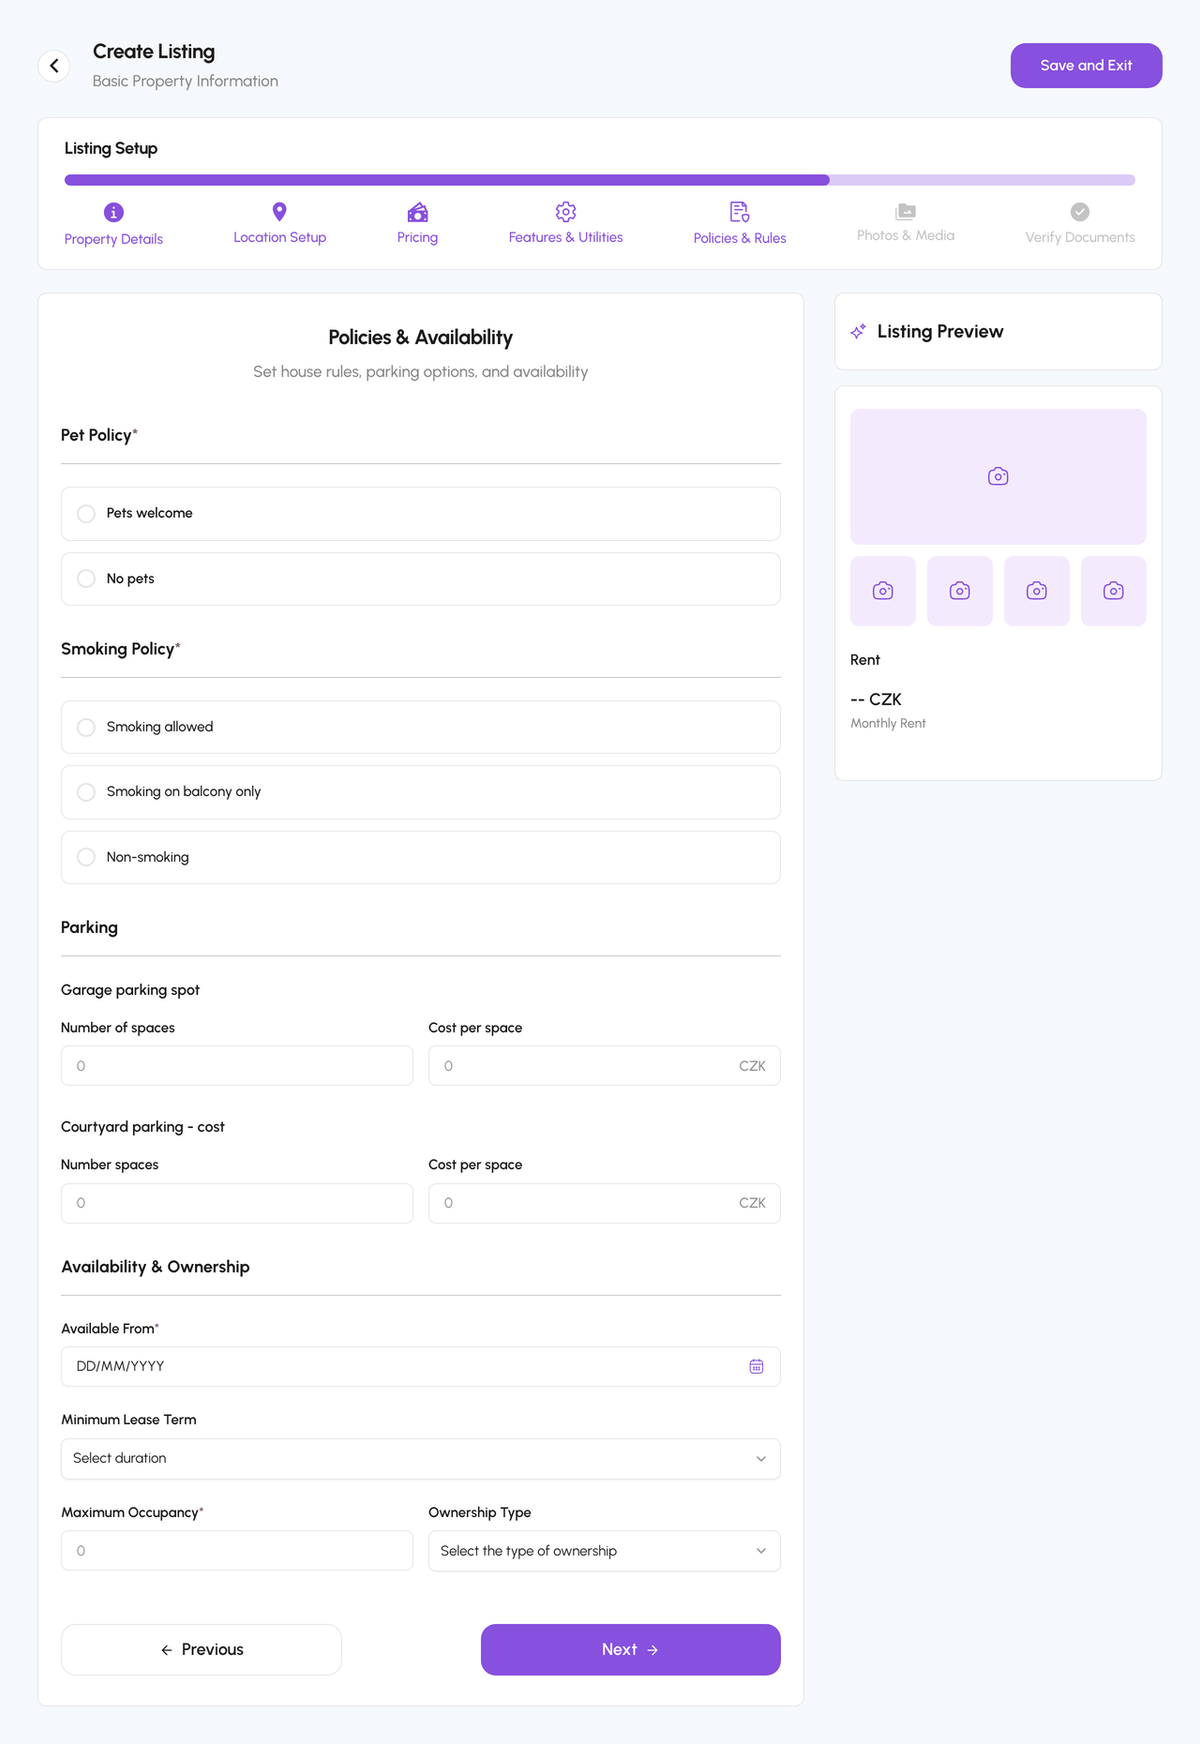
Pet policy (required), smoking policy (required), parking spaces and cost, and Availability & Ownership: available from (required), minimum lease term, maximum occupancy (required), and ownership type.
Step 6: Photos & Media
Upload per space (Exterior View, Living Room, Kitchen, Bedroom, Bathroom, Balcony, plus Others) or Upload All at Once. Minimum 3 and maximum 100 images per space; JPG, PNG, or WebP up to 10 MB each. A Quality Score out of 100 shows how the set looks. Optionally add a YouTube or Vimeo link under Video Management.
Step 7: Verify Documents and publish
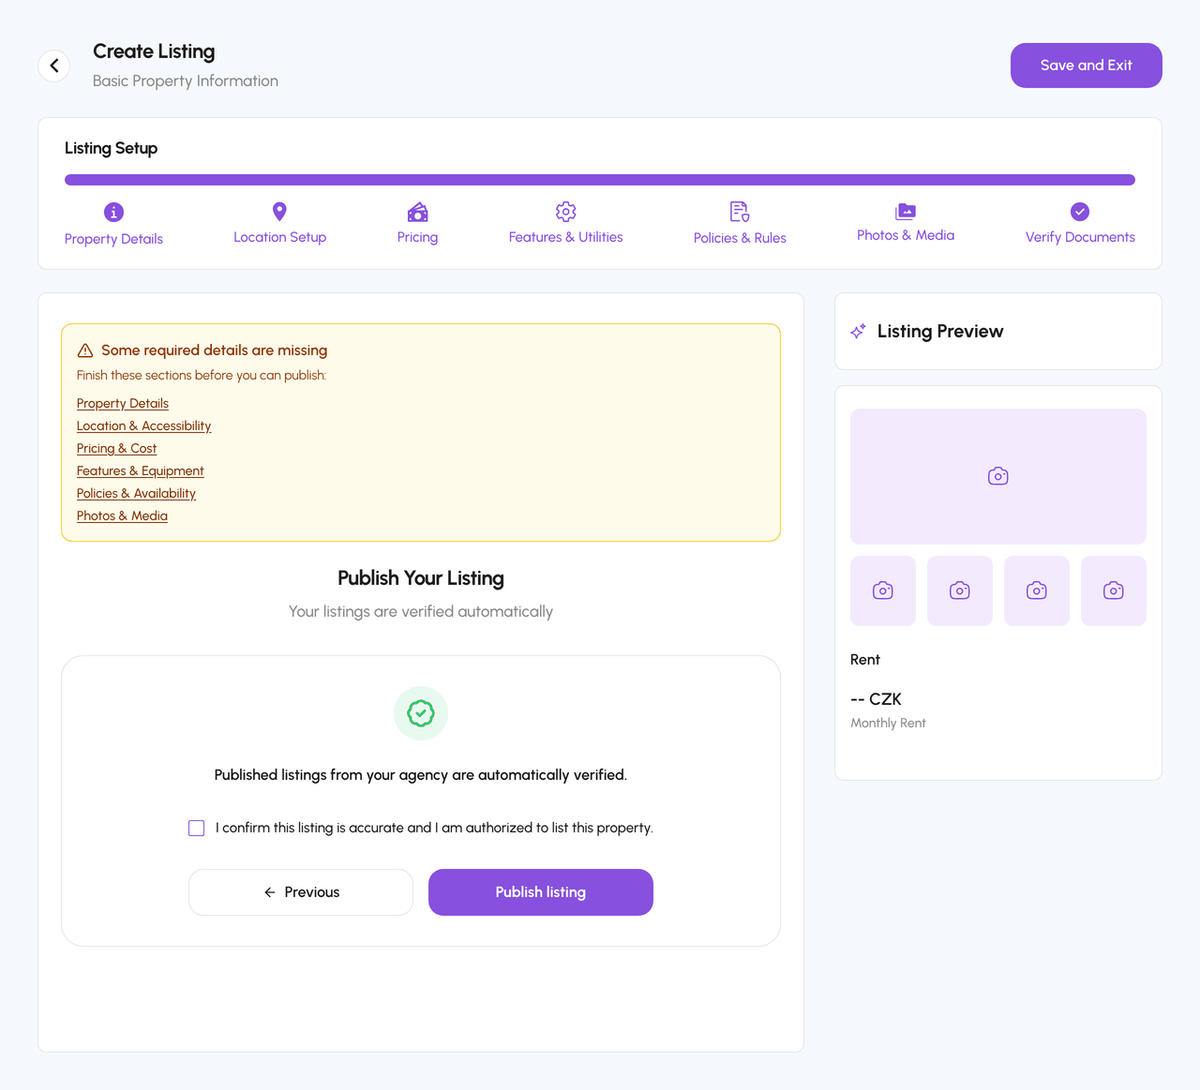
Upload the ownership or subletting document and tick the confirmation that the listing is accurate and you are authorised to list it. Hosts whose business is verified by IČO, and agents of a verified agency, skip the upload: "Published listings from your agency are automatically verified." Tap Publish listing. If required details are missing, the page lists the sections to finish.
After you publish
The listing goes to In Review; the team reviews it, usually within 24 hours, and it becomes Published and visible to renters. Documents are reviewed separately for the Verified badge. See Listing review, verification, and status. Drafts you saved with Save and Exit are under Manage, Drafts, where you can also Submit selected for review.
Pricing advice
Listings priced 10% above the district median sit empty; two weeks of vacancy costs more than the difference. Check comparable listings in Explore before you set the rent.
Step-by-step
- 1
Start the wizard
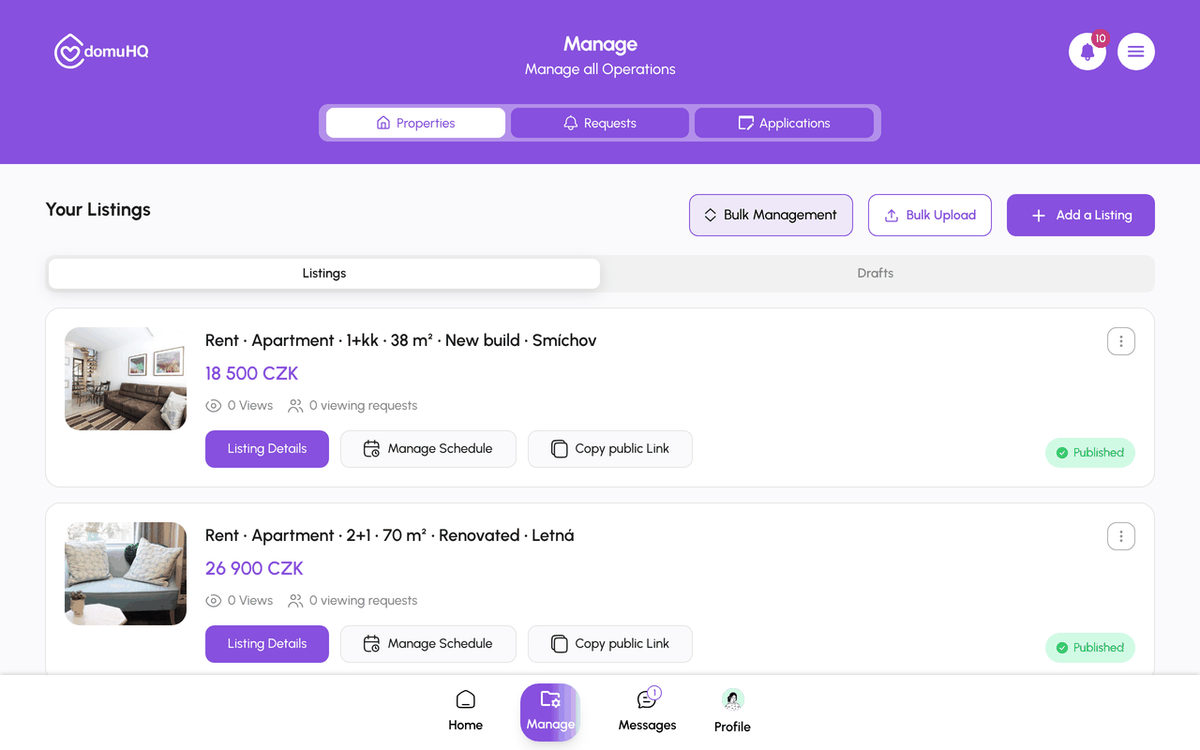
5 secondsManage, then Add a Listing (or the Create a Listing card on Home).
- 2
Property Details
5 minutesType, configuration, condition, description, areas, building details, energy class. Next.

- 3
Location Setup
1 minuteEnter the address and choose how precisely to show it.

- 4
Pricing, Features, Policies
5 minutesRent and deposit; heating, internet, furnishing, equipment; pets, smoking, parking, availability.
- 5
Photos & Media
5 minutesAt least 3 photos per space, up to 100. Use daylight, landscape orientation, and one photo of the building entrance.

- 6
Verify Documents and Publish listing
1 minuteUpload the ownership document (unless your business is verified), tick the confirmation, tap Publish listing.
Frequently asked questions
Can I publish without documents?
Yes. The listing is still reviewed and published; it just will not carry the Verified badge until documents are approved.
Can I save and finish later?
Yes. Save and Exit keeps a draft under Manage, Drafts. Open it to resume at the step you left.
Do I need DomuPlus to list a spare room?
Yes, one listing is included in DomuPlus (free until 2027). More than one listing needs a professional host plan.
Is HEIC accepted?
Photos are converted on upload from an iPhone; on the web use JPG, PNG, or WebP.
What to do next
- Listing review, the Verified badge, and listing statusesWhat In Review, Published, Reserved, Rented, Suspended, Verification Failed, and Re-upload Required mean, and how the Verified badge is earned.
- Manage listings: edit, availability, drafts, public link, deleteThe Manage tab is the host dashboard: Properties, Requests, Applications. Each listing card has Listing Details, Manage Schedule, and Copy public Link; from the details page you edit, set availability, or delete.
Related articles
Choose a professional host plan: Host Pro, Host Premium, Host Enterprise
One spare room fits the personal Host role on DomuPlus. Several properties need Host Pro (1 to 3 listings), Host Premium (up to 10, bulk upload, team tools) or Host Enterprise (unlimited, custom pricing). Free until 2027.
BeginnerBulk-upload listings from a spreadsheet
Host Premium and Host Enterprise can create up to 50 draft listings from one .xlsx file: download the template, fill one row per listing, upload, review the validation, create drafts, add photos, submit for review.
IntermediateSchedule and manage viewings
Hosts set a weekly availability schedule per listing; renters book a slot from the chat with Schedule a Viewing; both sides confirm, reschedule, or cancel from Requests and the chat.
Beginner